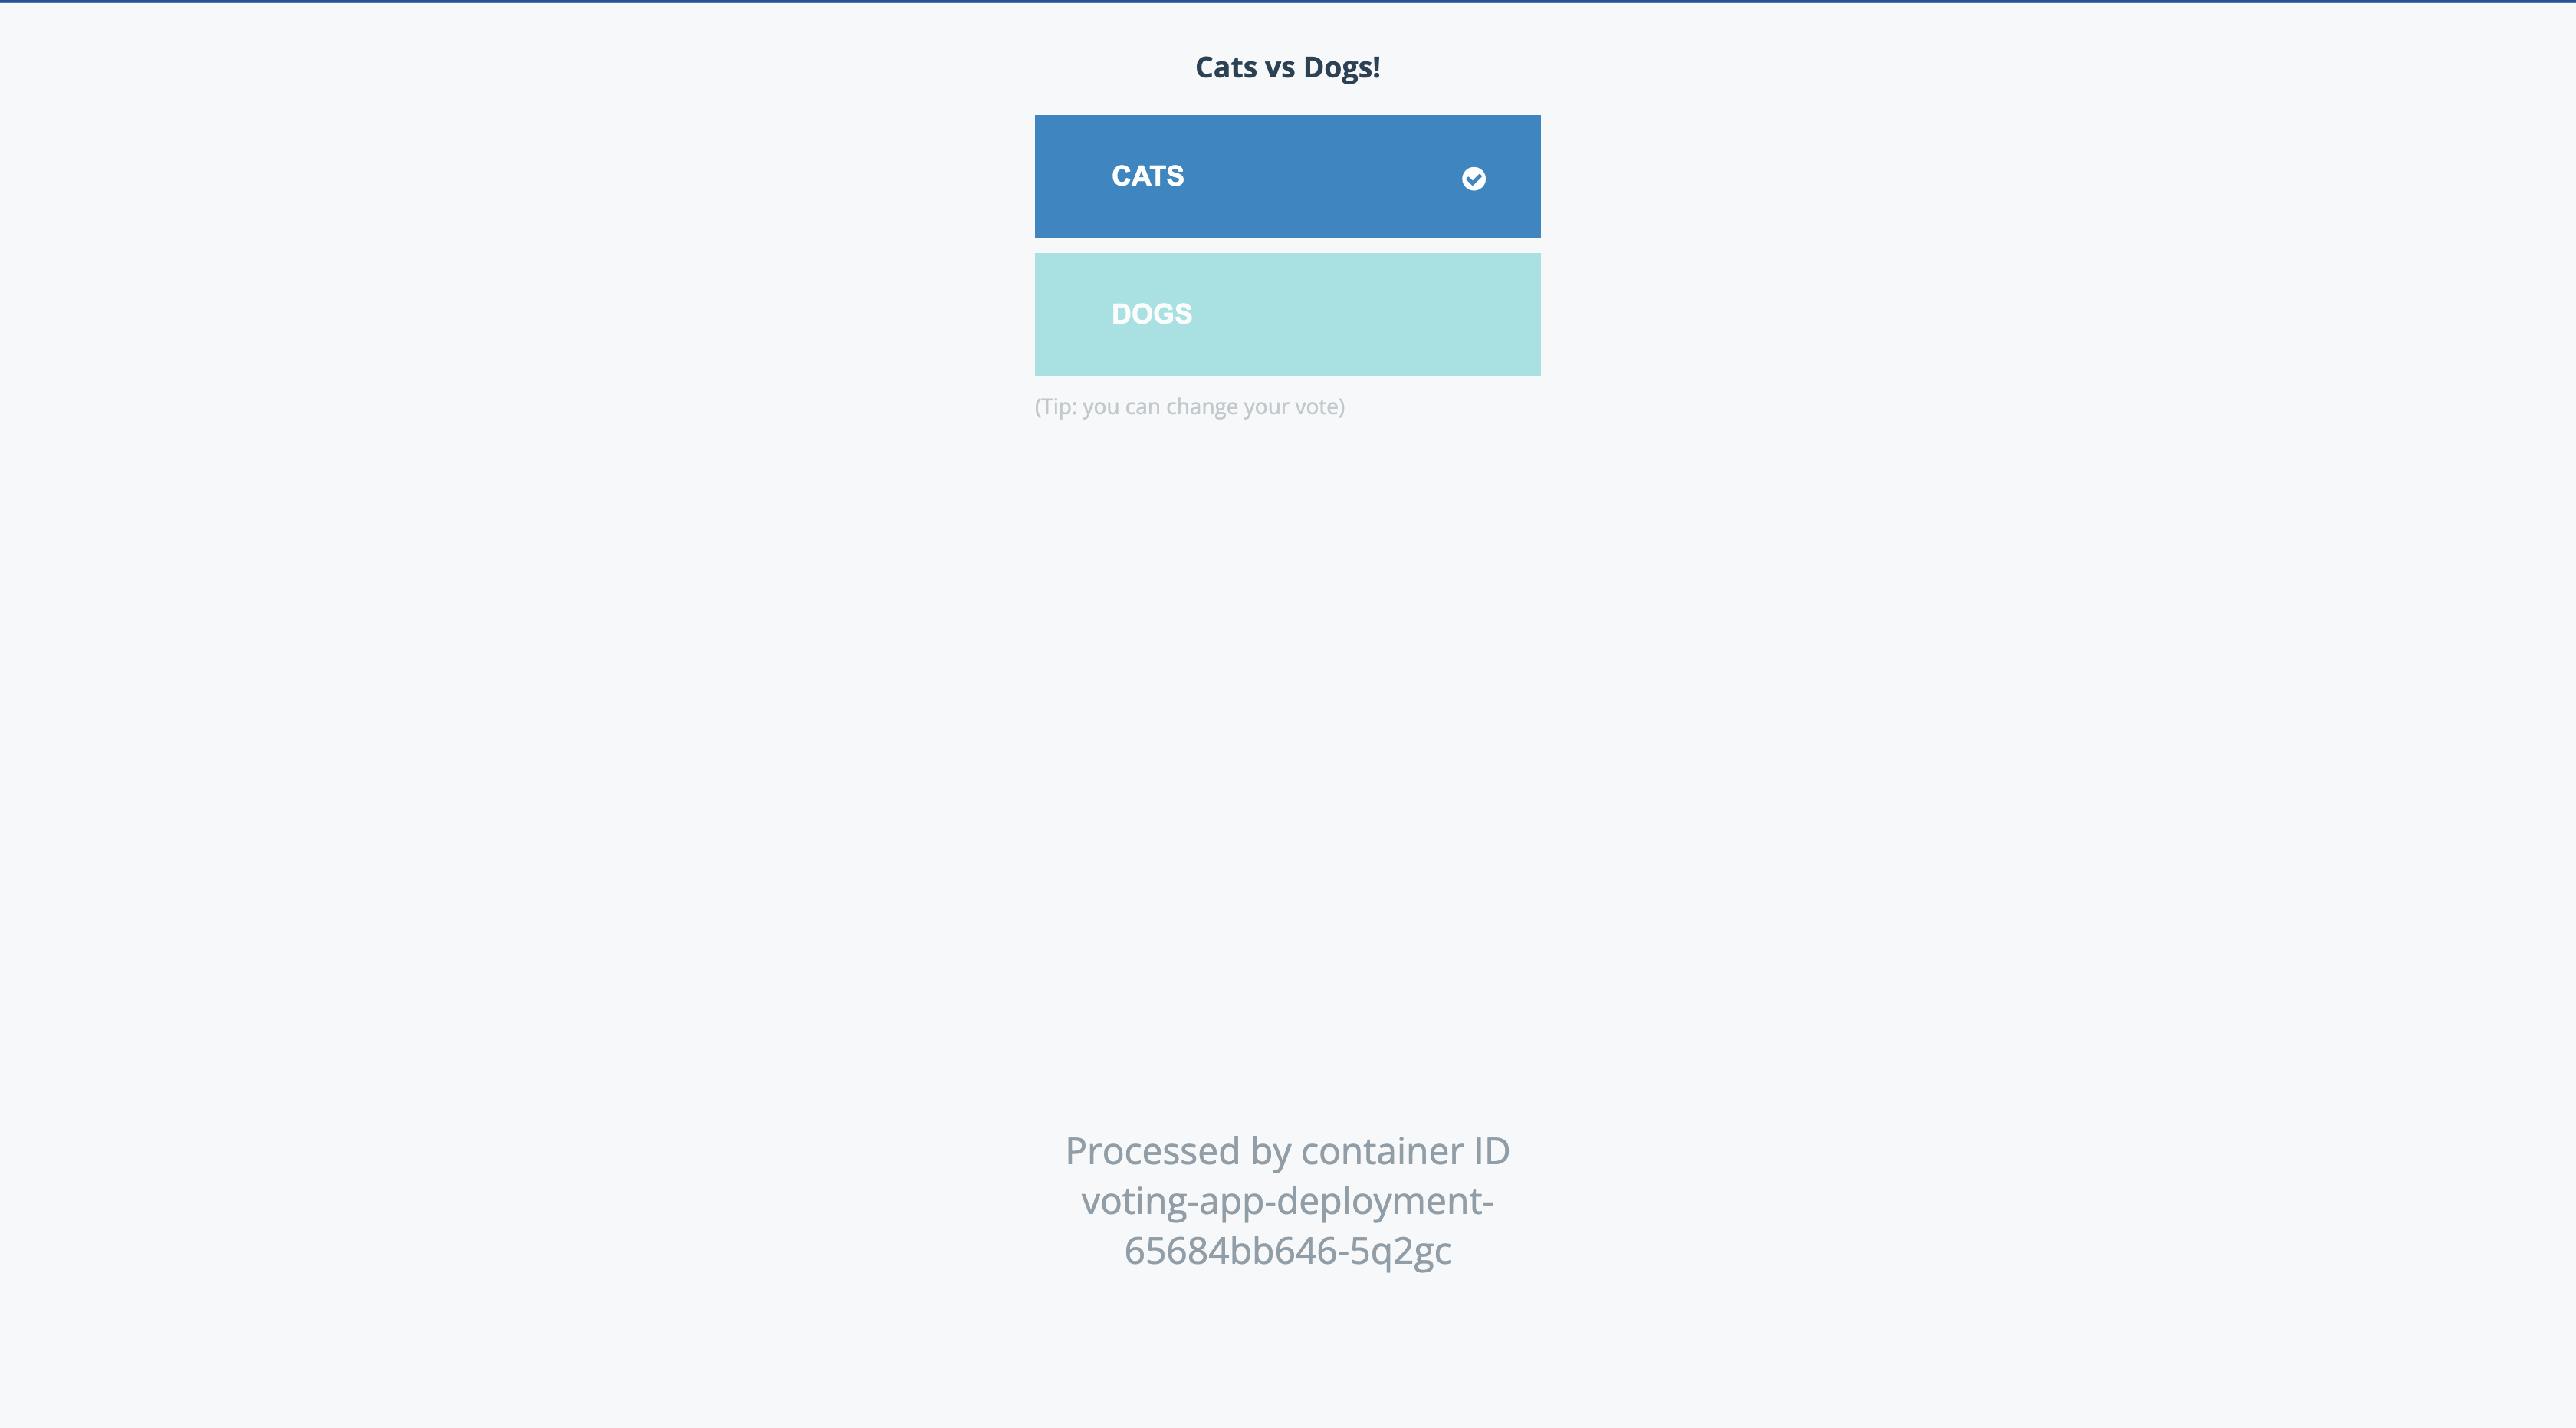
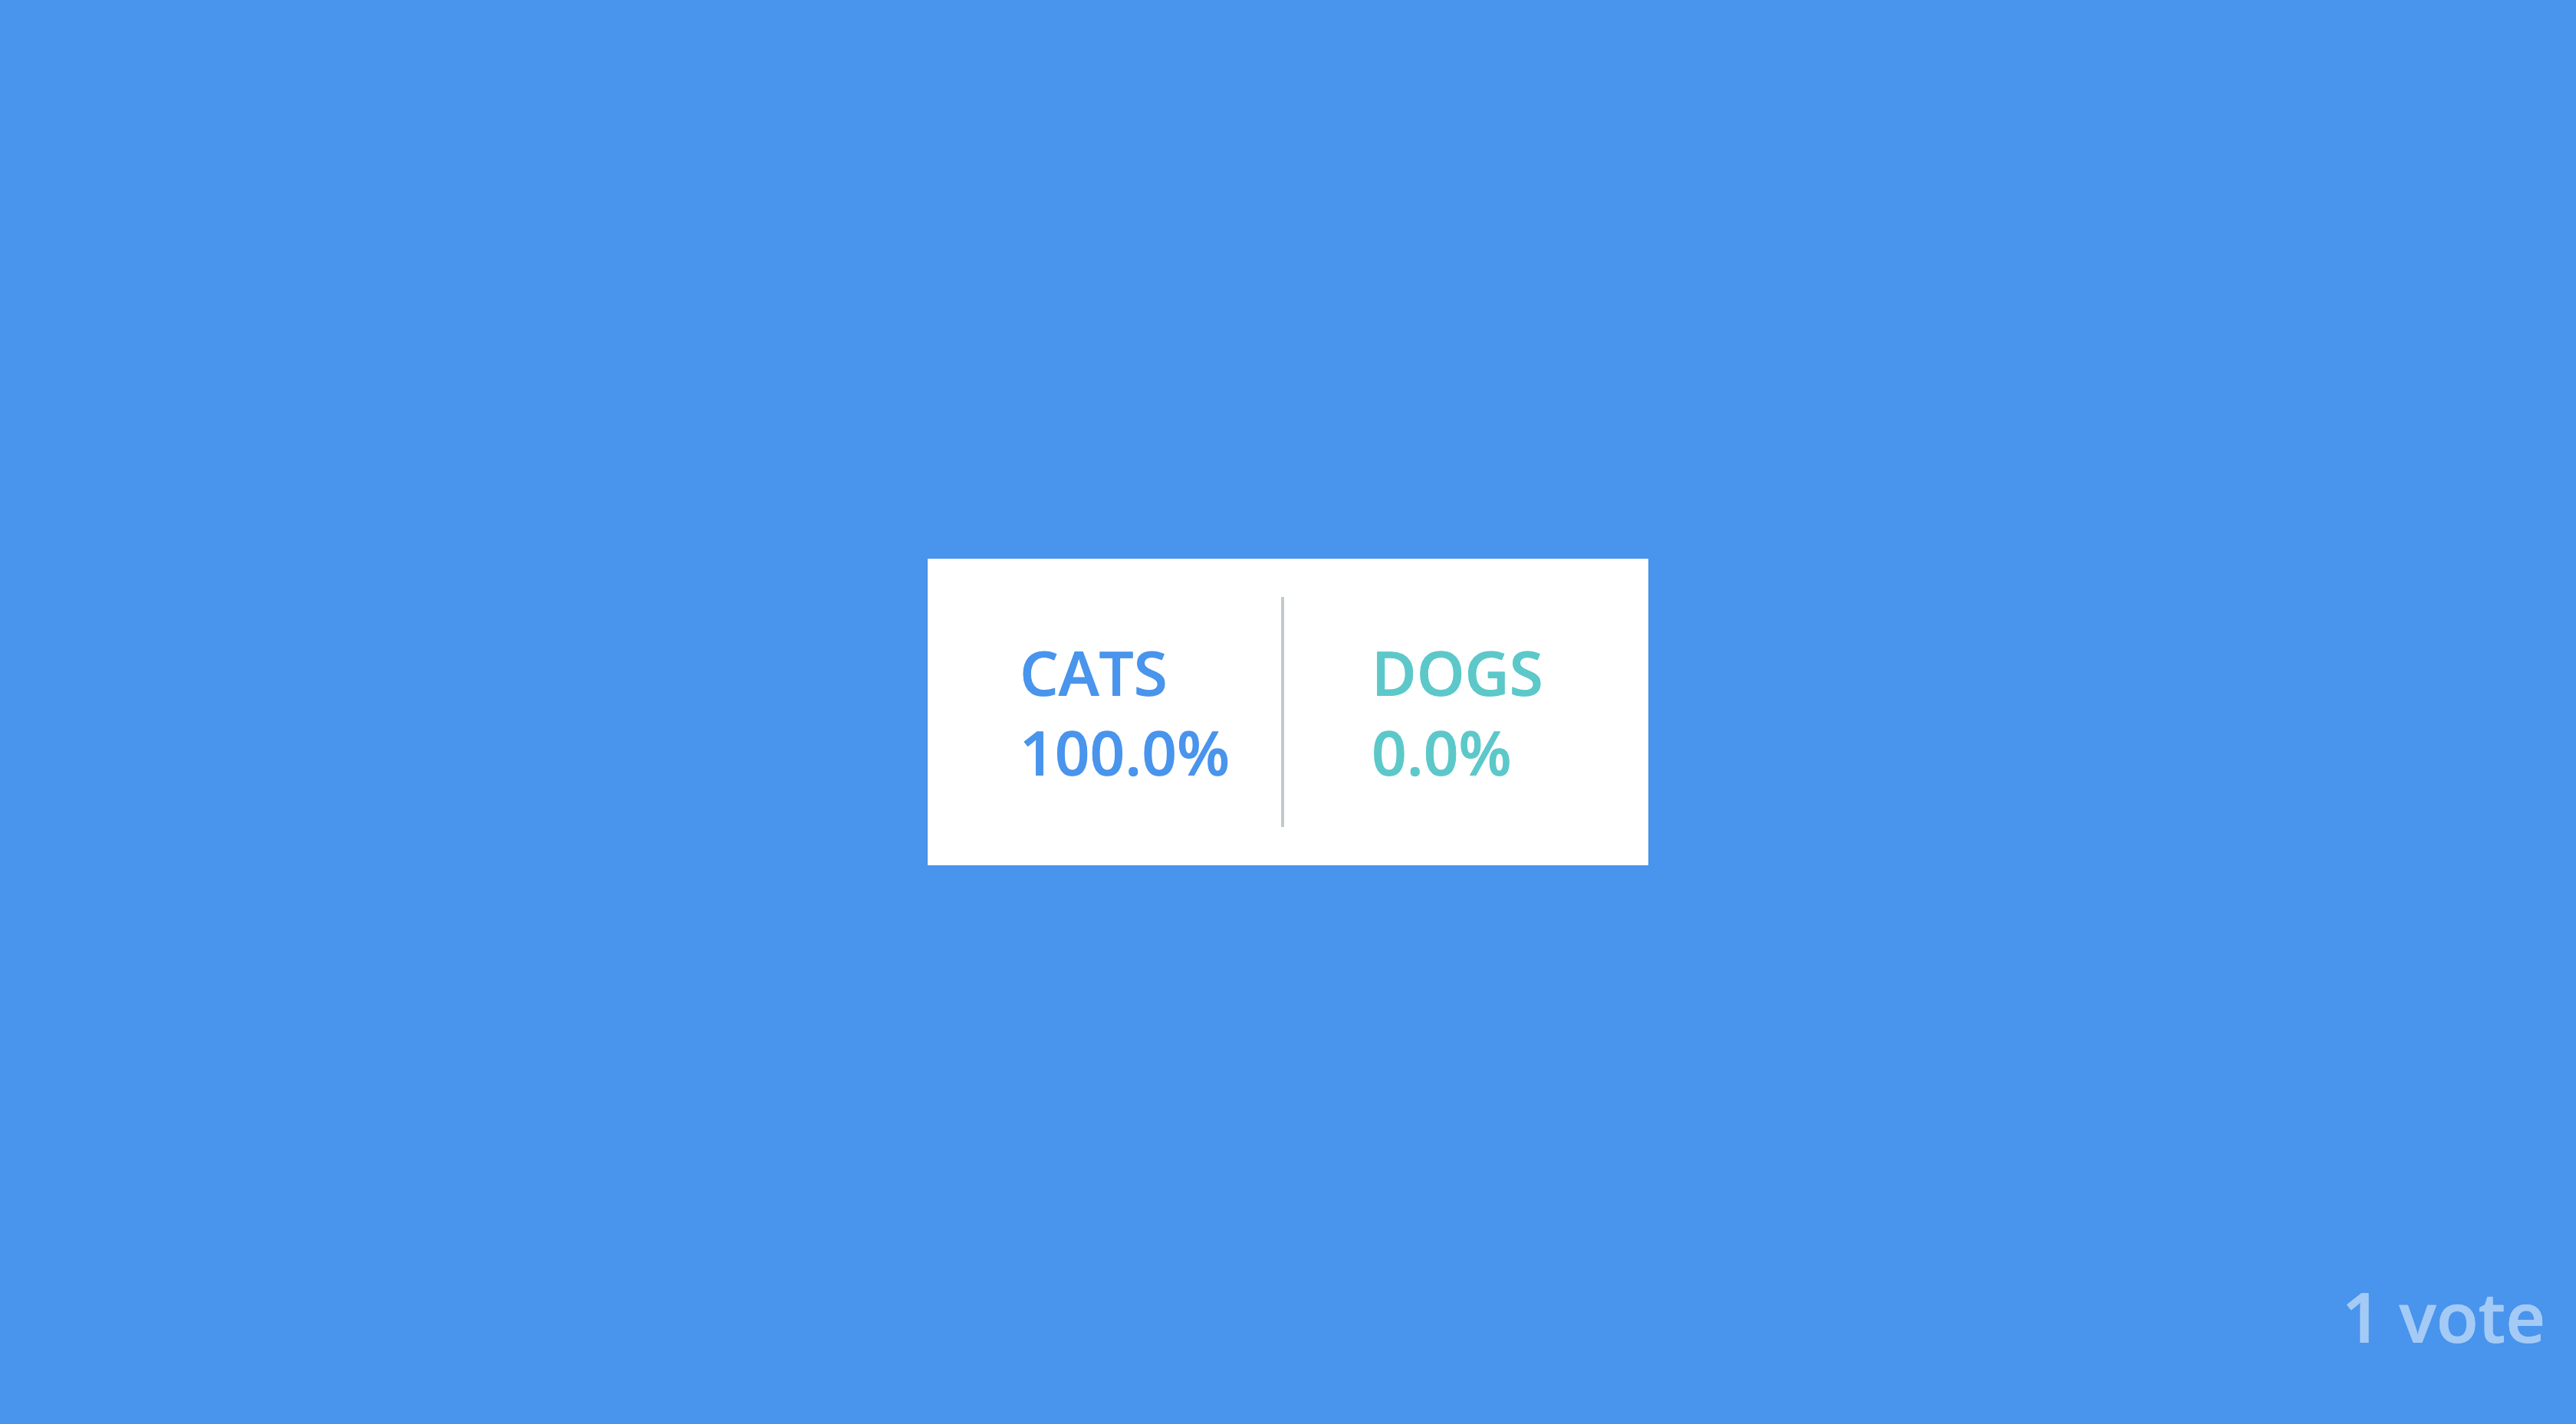
This time we will try to deploy our service to the Google Cloud Platform Server. Google Cloud has been specifically provided for deployment in the form of Kubernetes, namely in the form of Google Kubernetes Engine so that when we want to deploy our services it becomes easier.
You also need to know that if we haven’t subscribed to Google Cloud, we first need to subscribe or register for free for the first year to be able to use Google Cloud with our respective Gmail accounts.
So, let’s try accessing the Google Cloud website on this site Google Cloud and choose the console or register if you have not access to the Google Cloud.
Create a Kubernetes Cluster
Preparations if we want to deploy our services on GKE, we need to carry out the following stages.
- Create a Kubernetes Cluster on Google Cloud, if you want to understand more, read several steps there and we can also do customization starting from virtual cloud specifications such as memory requirements, CPU and others.
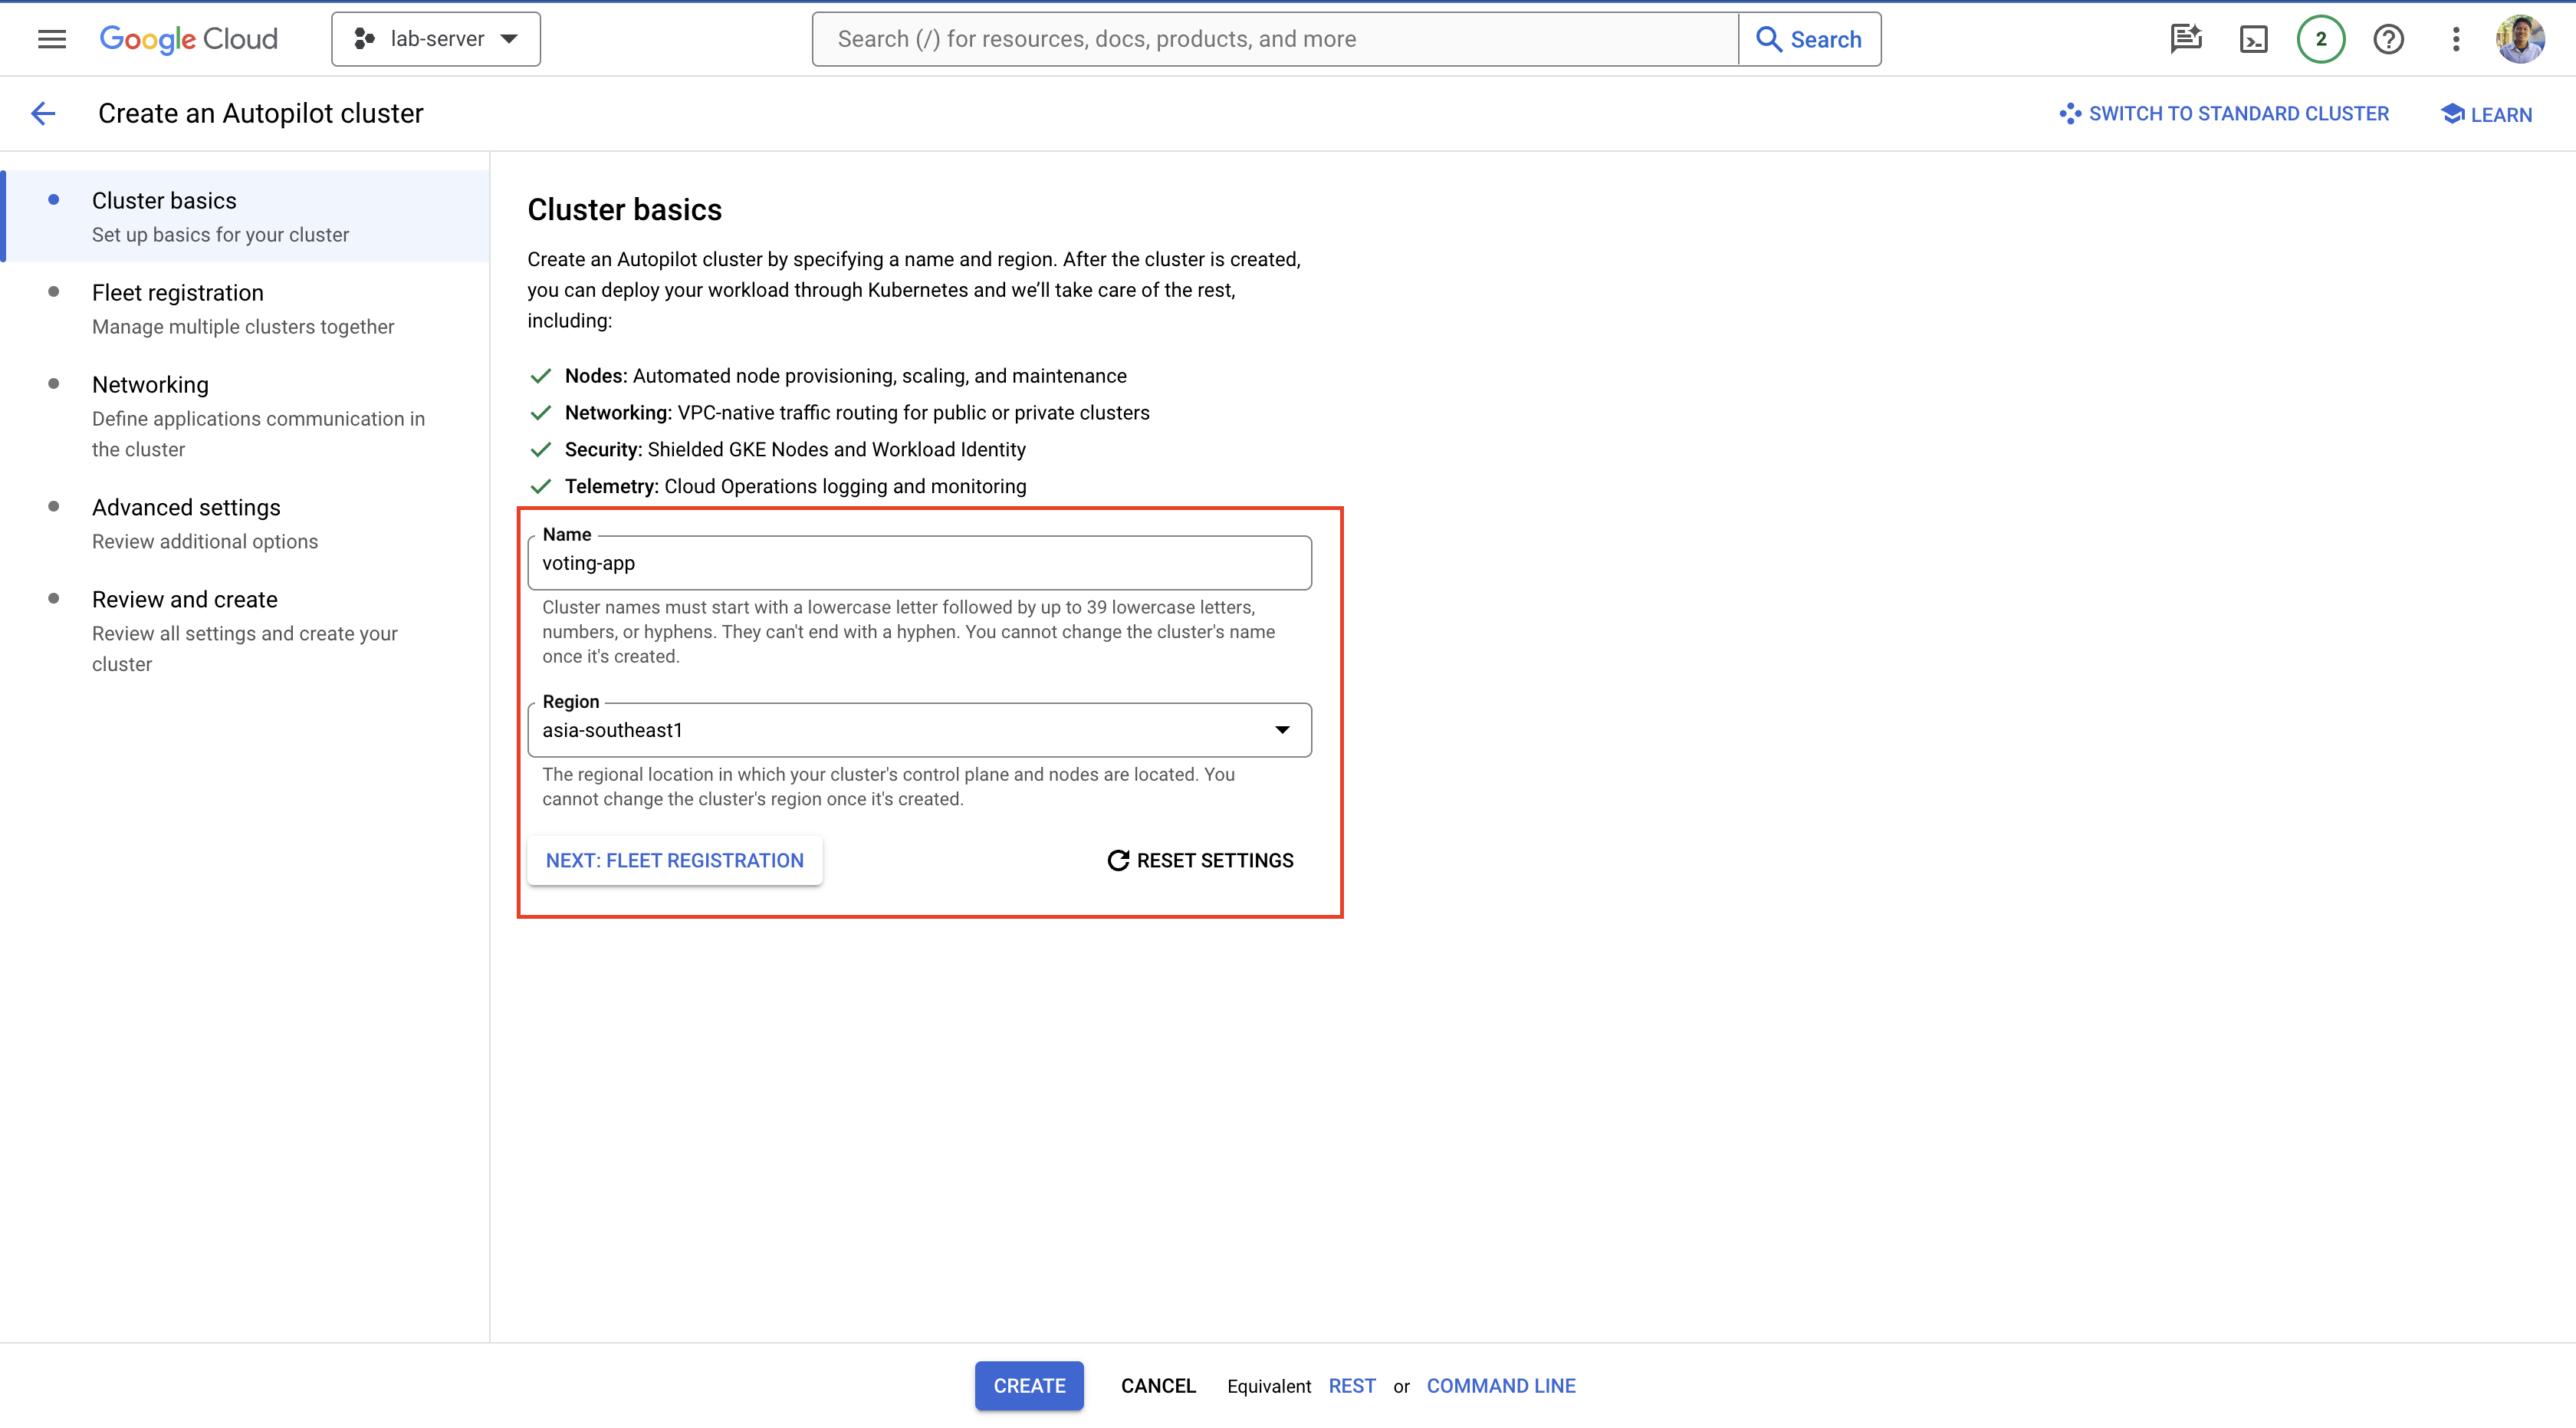
- Select the create button after all the configurations have been set, or if you want the default then just press the create button until you wait for the cluster to be successfully created as below.
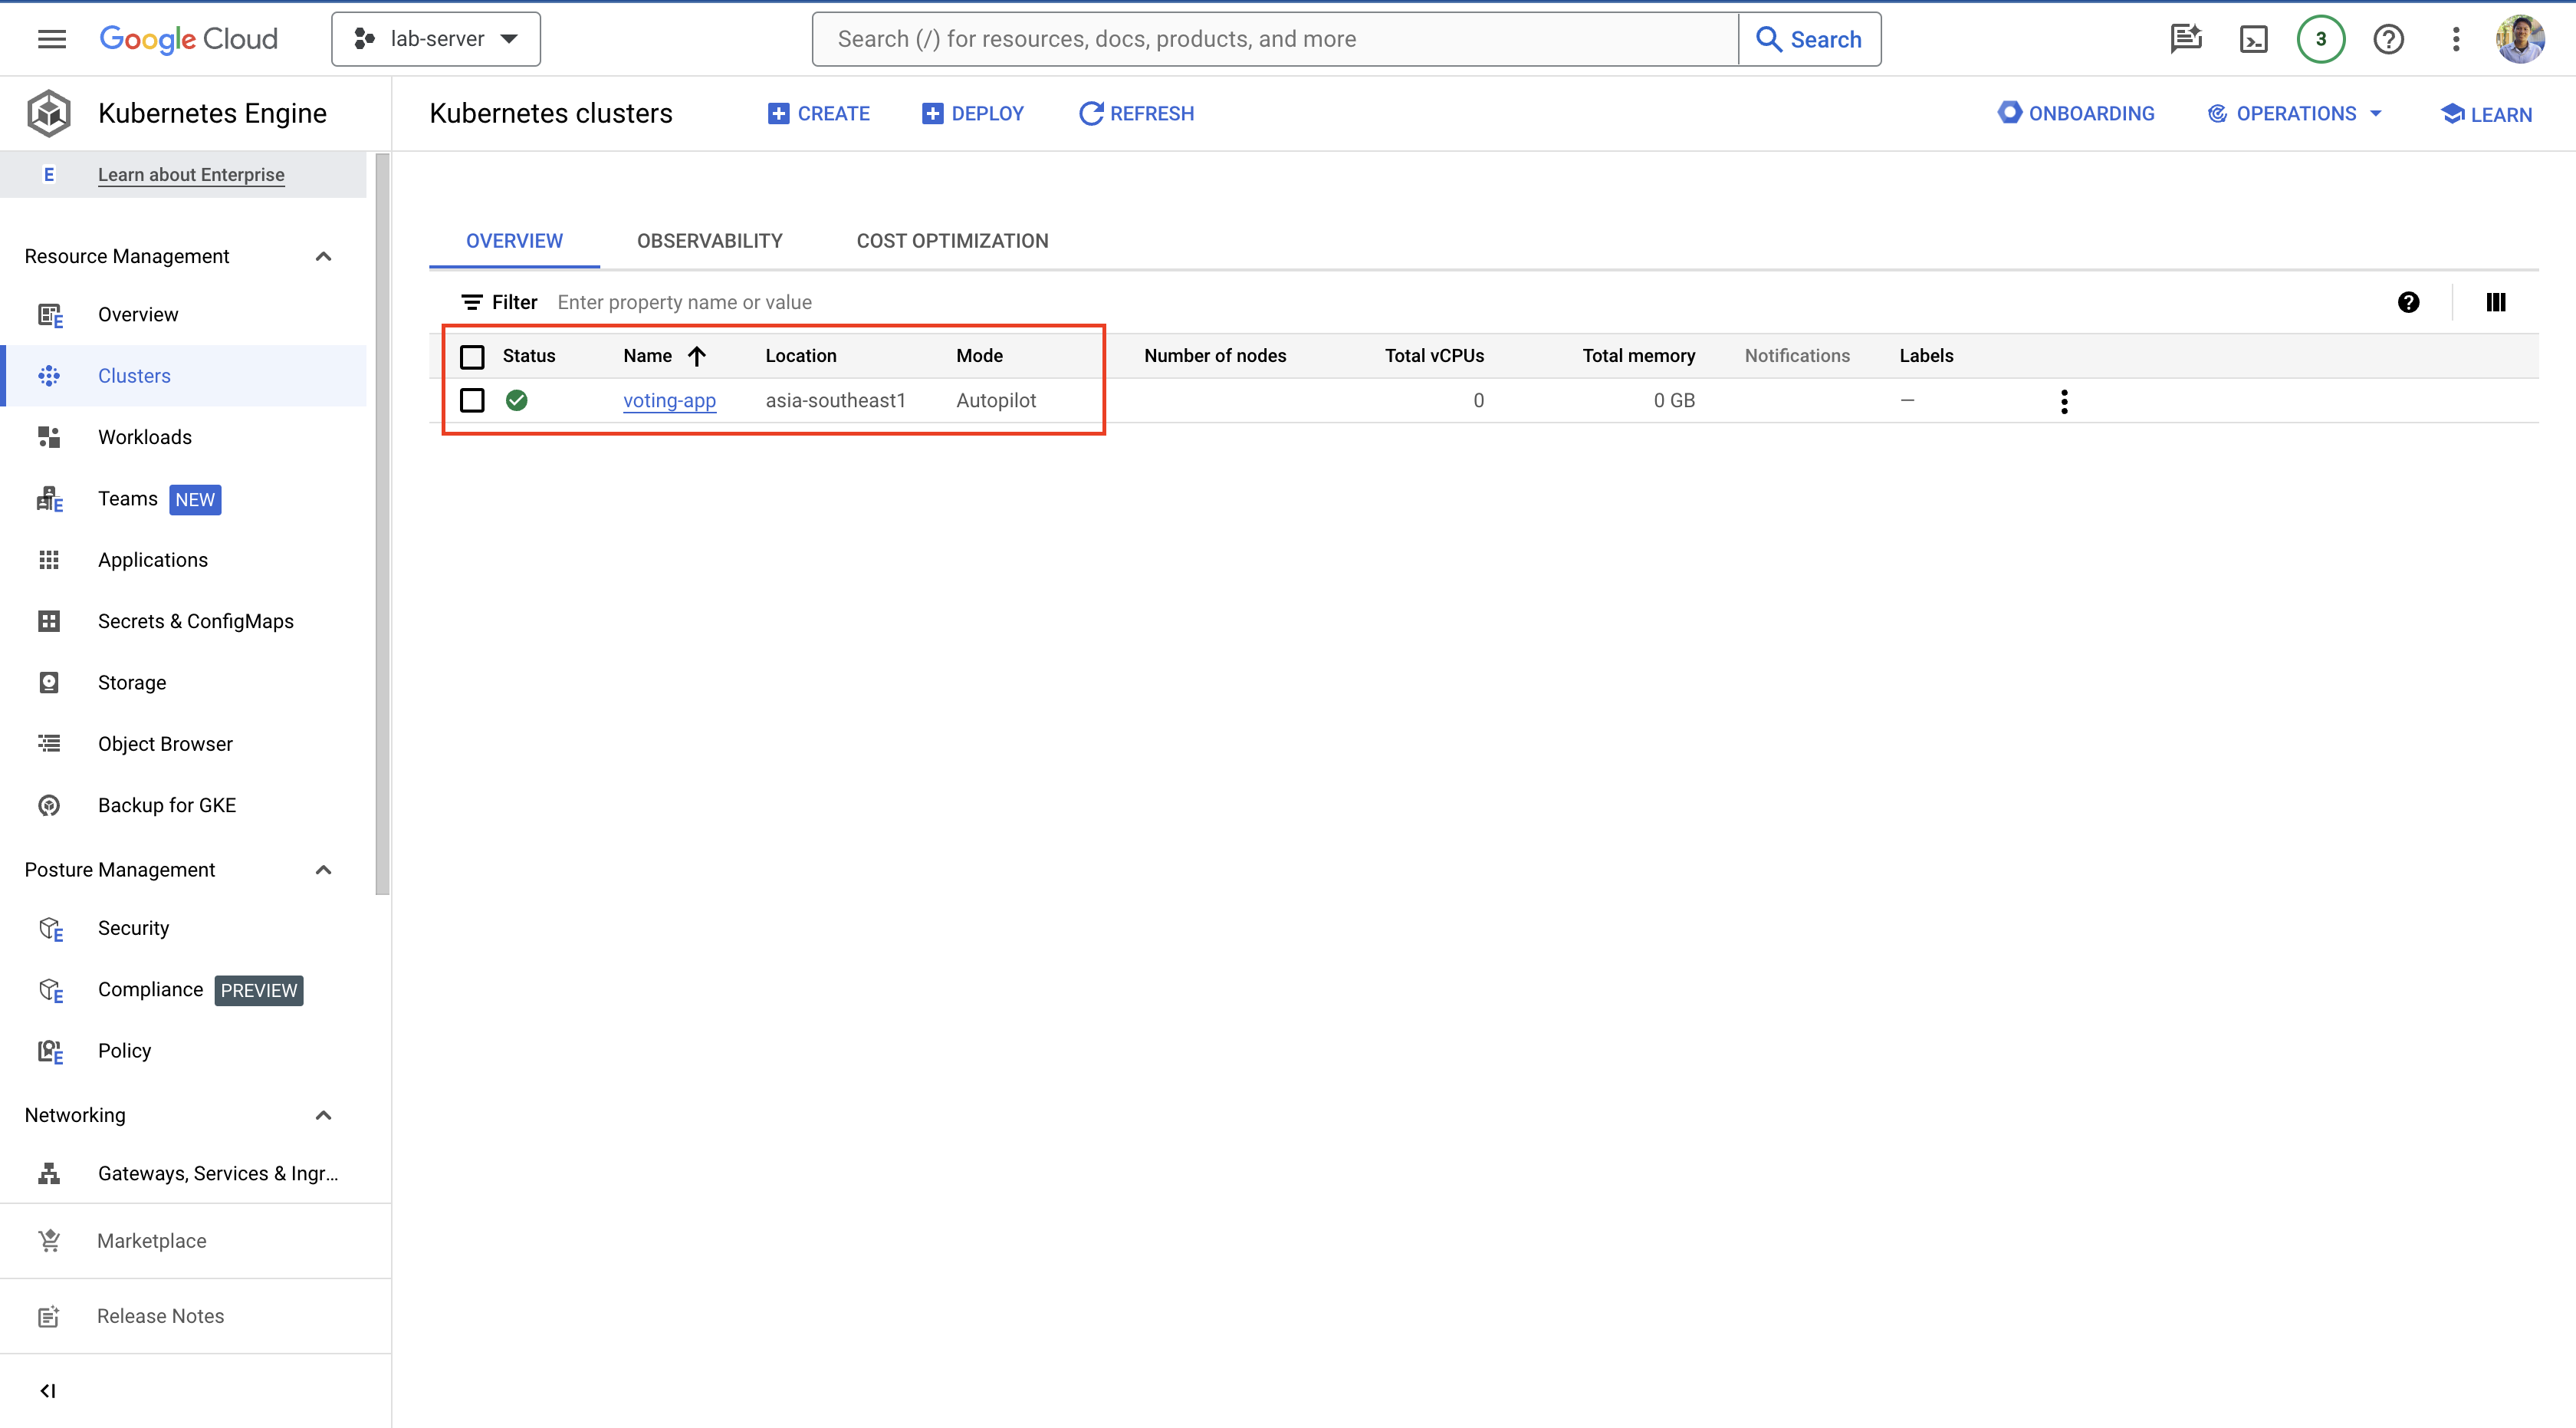
- When finished, we continue by selecting
Connectto the cluster that we have created.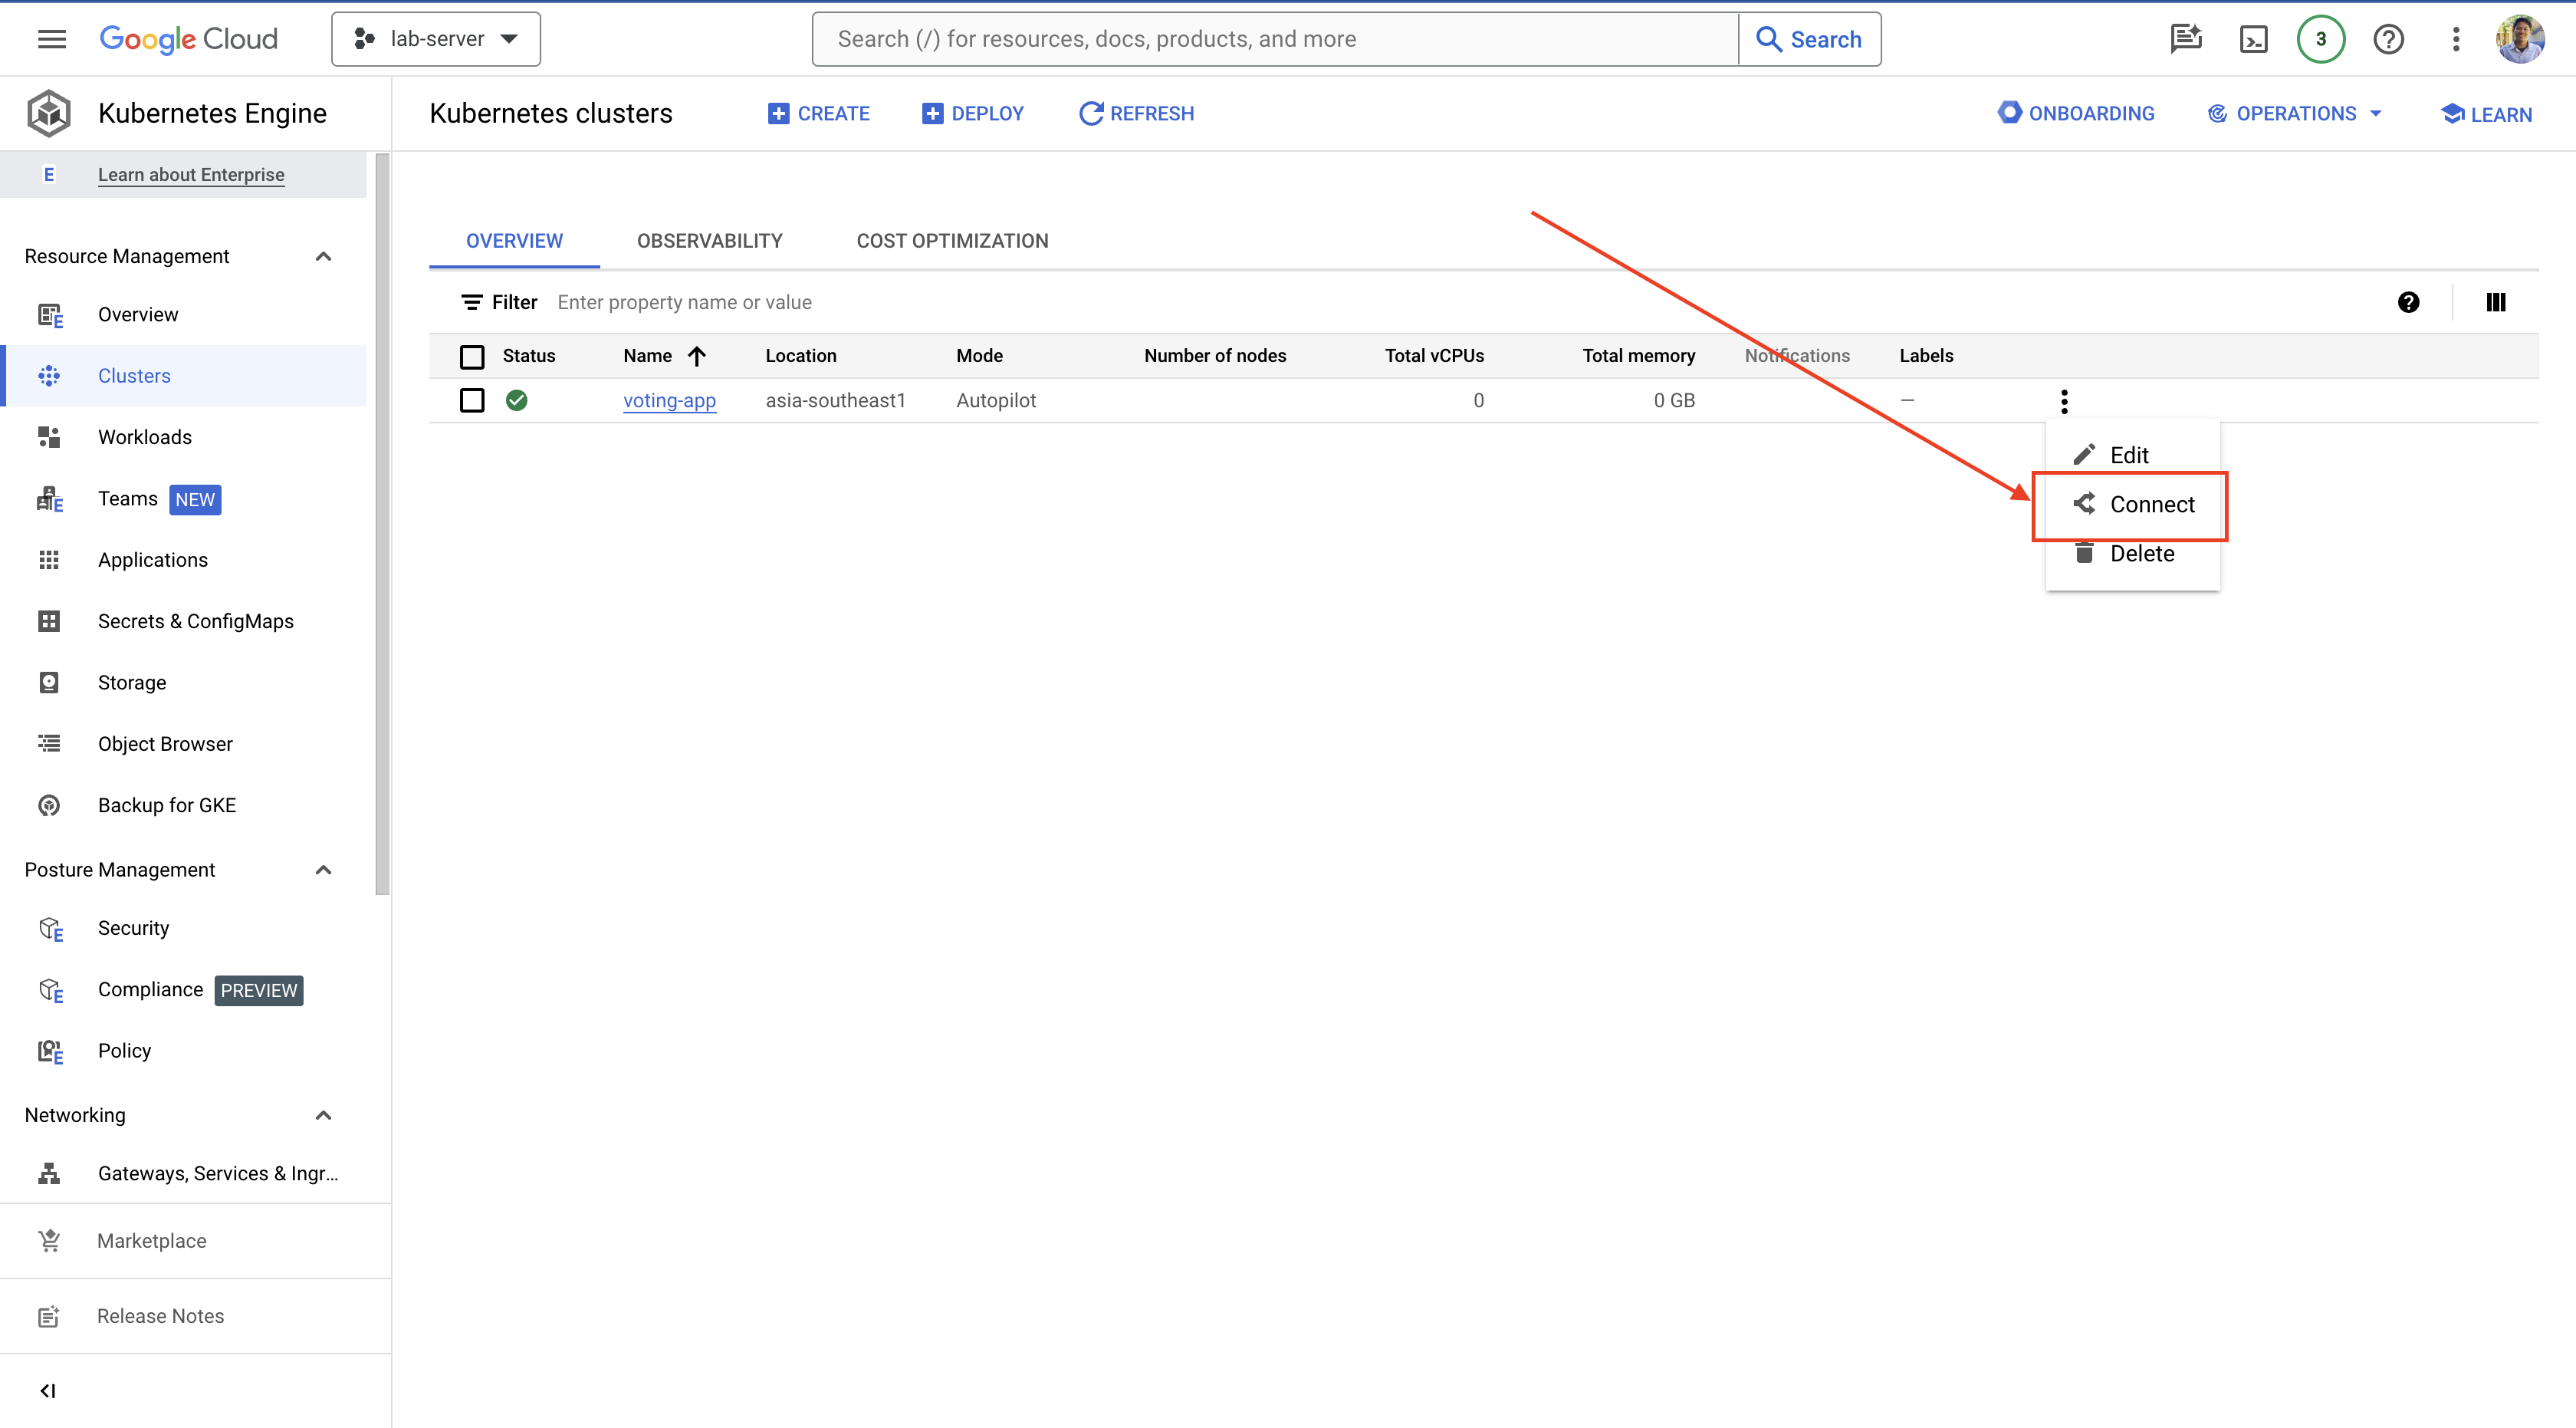
- A pop up will appear and then copy the terminal and select
Run in Cloud Shell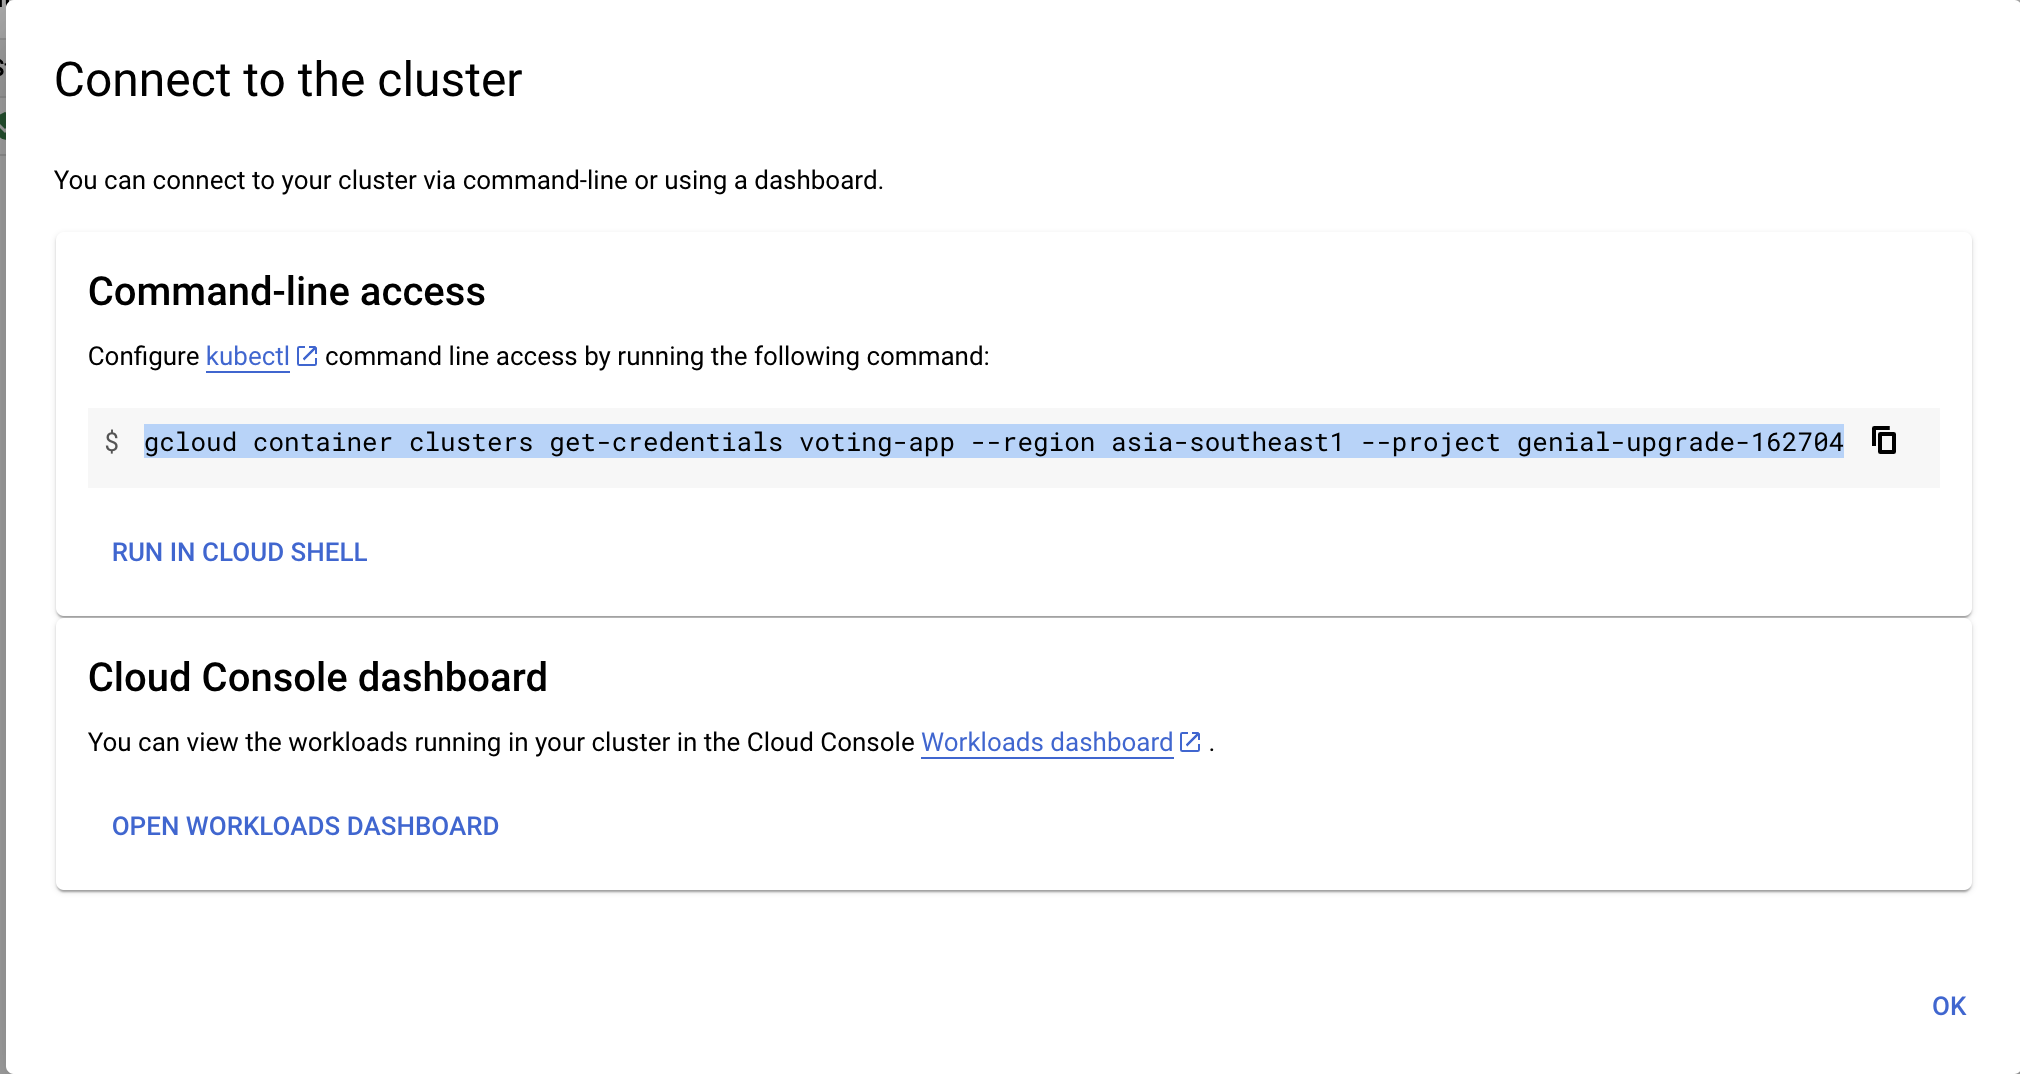
- A terminal will appear at the bottom of the display, then enter and wait until everything is finished.
If it appears on the terminal as below, it means the process is complete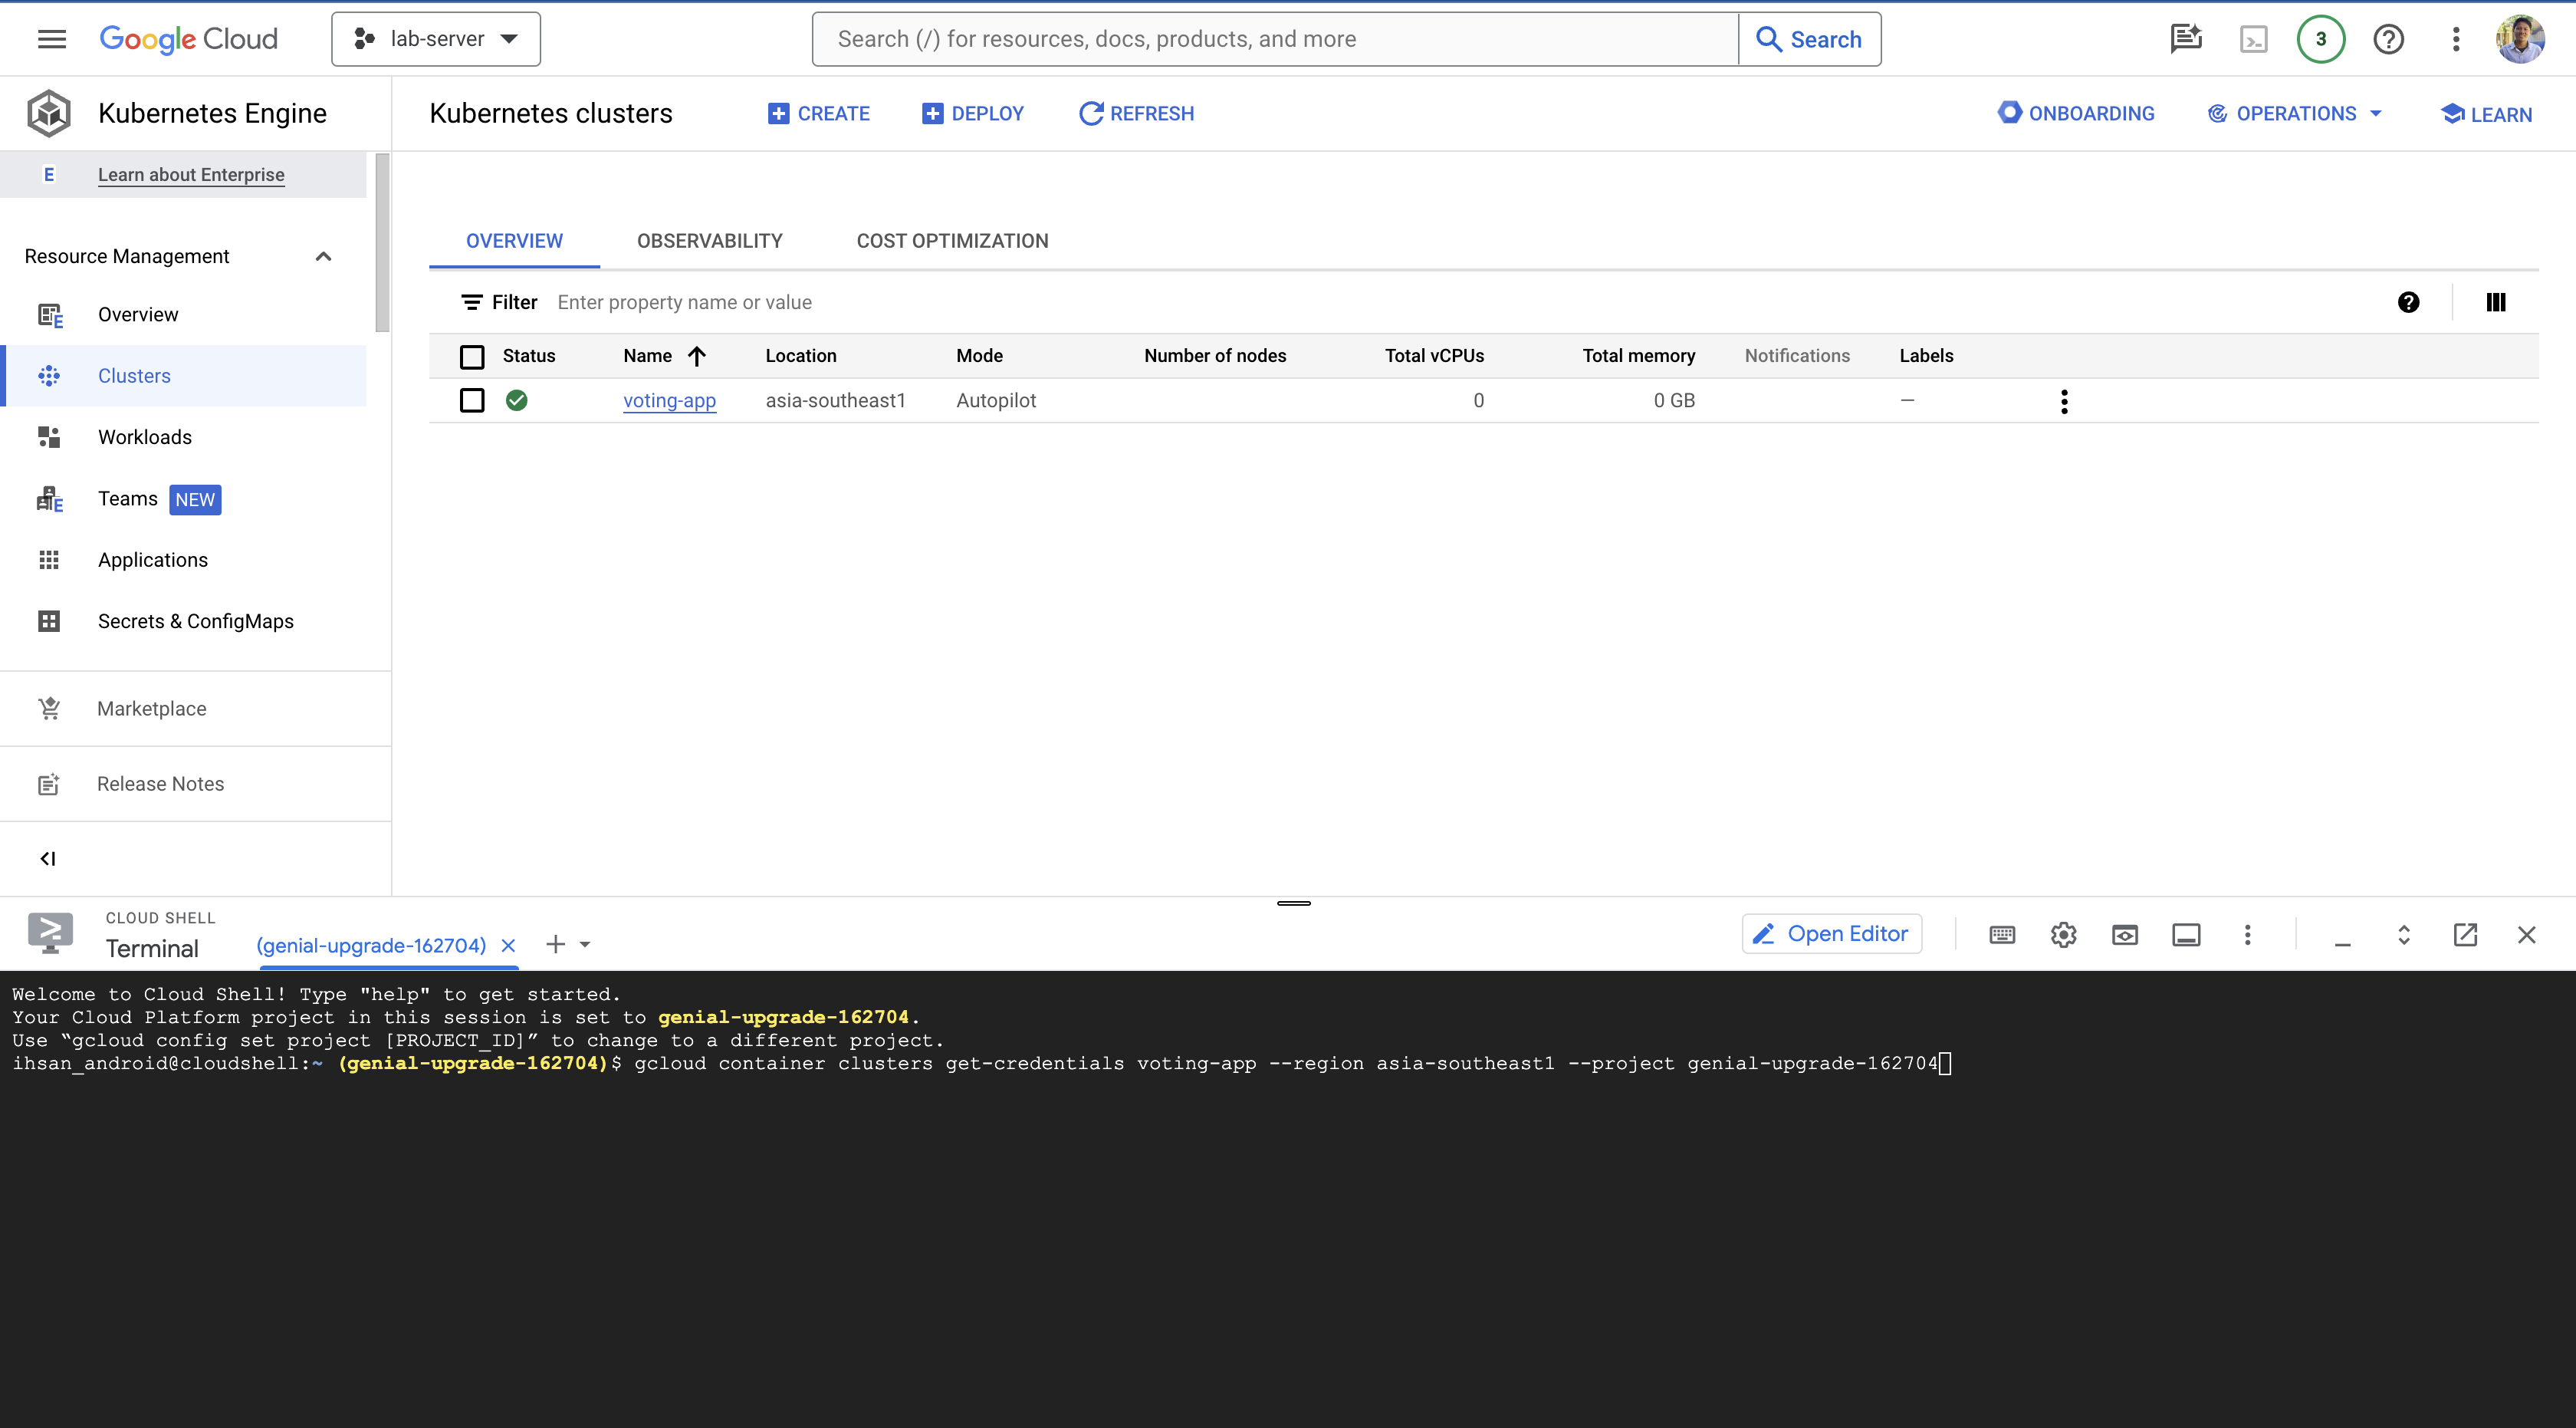
ihsan_android@cloudshell:~ (genial-upgrade-162704)$ gcloud container clusters get-credentials voting-app --region asia-southeast1 --project genial-upgrade-162704
Fetching cluster endpoint and auth data.
kubeconfig entry generated for voting-app.
Clone YAML Files
Prepare the YAML file template that we have previously created or can clone on [this] github (https://github.com/santekno/kubernetes-for-beginners)
git clone https://github.com/santekno/kubernetes-for-beginners
cd kubernetes-for-beginners/
ls -l
total 20
drwxr-xr-x 7 ihsan_android ihsan_android 4096 Mar 25 07:03 demo
drwxr-xr-x 2 ihsan_android ihsan_android 4096 Mar 25 07:03 deployments
drwxr-xr-x 2 ihsan_android ihsan_android 4096 Mar 25 07:03 pod
drwxr-xr-x 2 ihsan_android ihsan_android 4096 Mar 25 07:03 replicasets
drwxr-xr-x 2 ihsan_android ihsan_android 4096 Mar 25 07:03 services
Let’s see all file that already to clone on this repository, then create the command bellow to deploy all services
kubectl create -f demo/voting-app/voting-app-deployment.yaml
kubectl create -f demo/voting-app/voting-app-service.yaml
kubectl create -f demo/result-app/result-app-deployment.yaml
kubectl create -f demo/result-app/result-app-service.yaml
kubectl create -f demo/redis/redis-deployment.yaml
kubectl create -f demo/redis/redis-service.yaml
kubectl create -f demo/postgres/postgres-deployment.yaml
kubectl create -f demo/postgres/postgres-service.yaml
kubectl create -f demo/worker-app/worker-app-deployment.yaml
waiting for a minutes or we can see to make sure the status the services will be running or not with the command below.
kubectl get svc,deployment,pods
The result will be show below.
NAME                     TYPE           CLUSTER-IP       EXTERNAL-IP   PORT(S)        AGE
service/db               ClusterIP      34.118.225.53    <none>        5432/TCP       44s
service/kubernetes       ClusterIP      34.118.224.1     <none>        443/TCP        36m
service/redis            ClusterIP      34.118.230.85    <none>        6379/TCP       45s
service/result-service   LoadBalancer   34.118.239.230   <pending>     80:30140/TCP   47s
service/voting-service   LoadBalancer   34.118.230.44    <pending>     80:31376/TCP   50s

NAME                                    READY   UP-TO-DATE   AVAILABLE   AGE
deployment.apps/postgres-deployment     0/1     1            0           45s
deployment.apps/redis-deployment        0/1     1            0           46s
deployment.apps/result-app-deployment   0/1     1            0           47s
deployment.apps/voting-app-deployment   0/3     3            0           51s
deployment.apps/worker-app-deployment   0/3     3            0           42s

NAME                                         READY   STATUS    RESTARTS   AGE
pod/postgres-deployment-c9fdd58fd-ftljj      0/1     Pending   0          45s
pod/redis-deployment-5989f8dddf-jbtrg        0/1     Pending   0          46s
pod/result-app-deployment-5d9f49b9ff-mrc2g   0/1     Pending   0          47s
pod/voting-app-deployment-65684bb646-5q2gc   0/1     Pending   0          49s
pod/voting-app-deployment-65684bb646-6cbph   0/1     Pending   0          49s
pod/voting-app-deployment-65684bb646-rgr56   0/1     Pending   0          50s
pod/worker-app-deployment-fd4cb7b6d-4wmg2    0/1     Pending   0          42s
pod/worker-app-deployment-fd4cb7b6d-6p4j5    0/1     Pending   0          42s
pod/worker-app-deployment-fd4cb7b6d-nl25s    0/1     Pending   0          42s

If we want to see the Public IP of the voting-app and result-app services then we need to look at the workfload menu
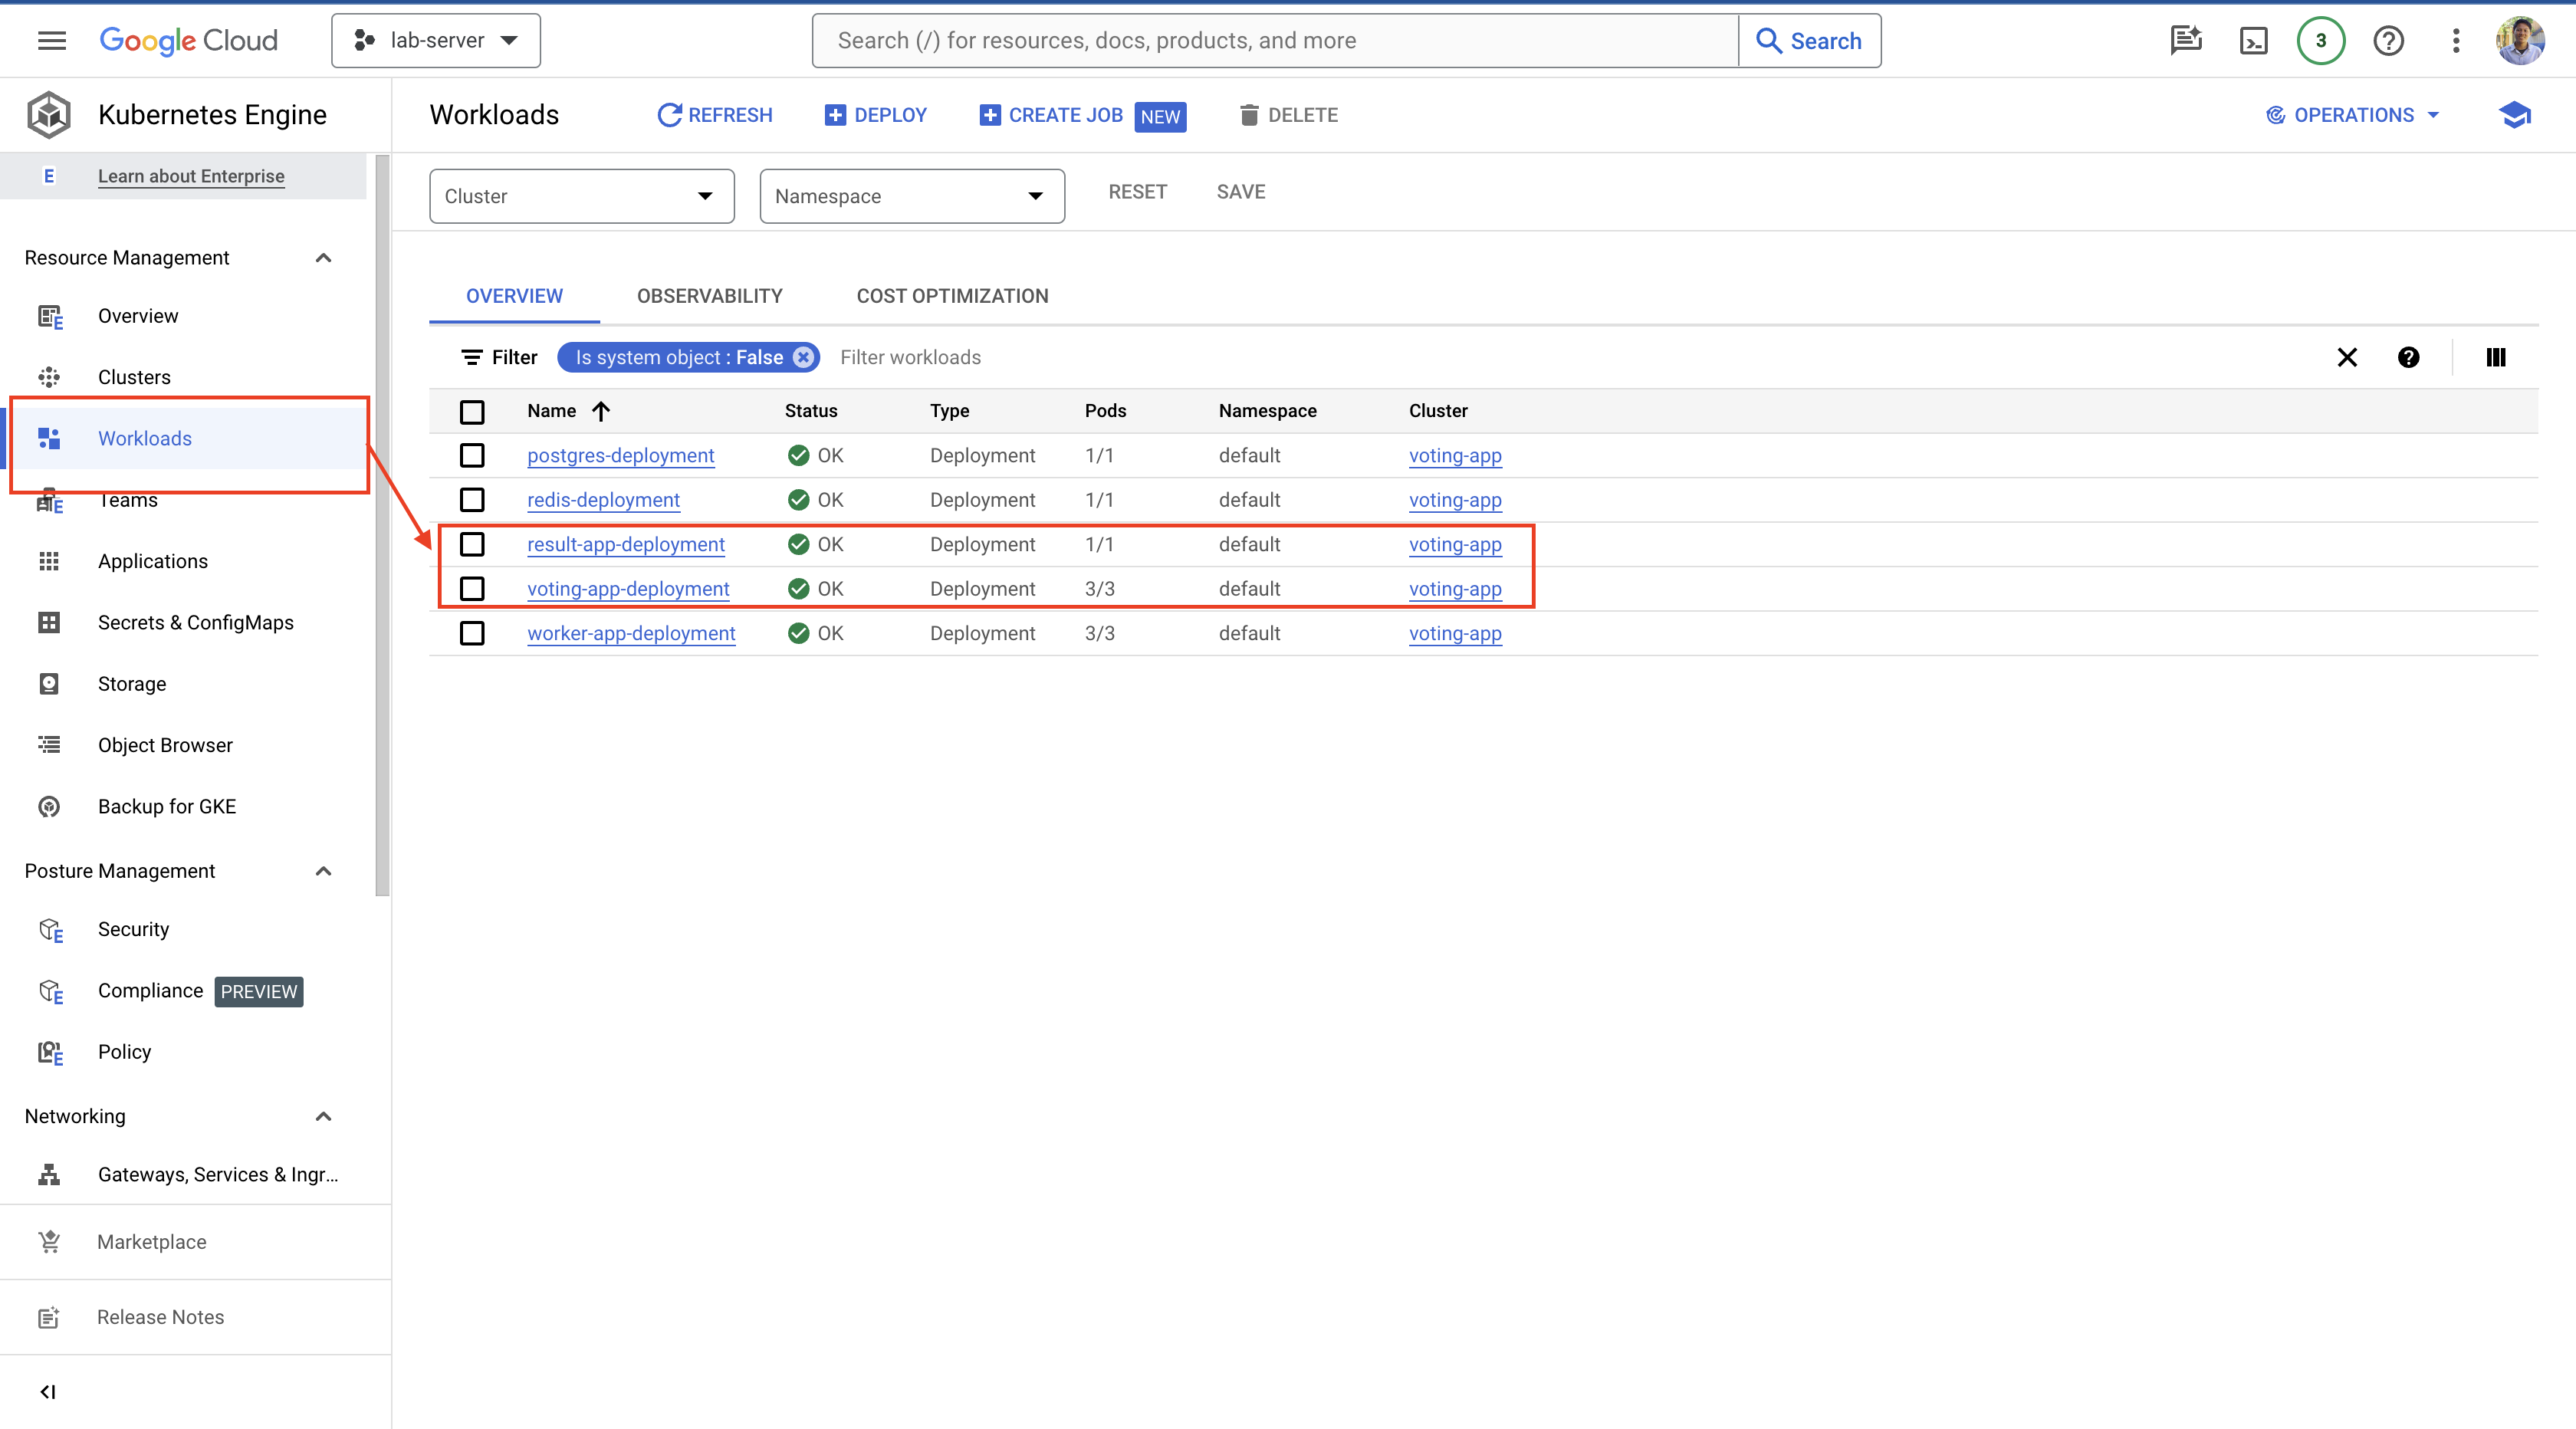
We can see the Public IP voucher with a display like this.
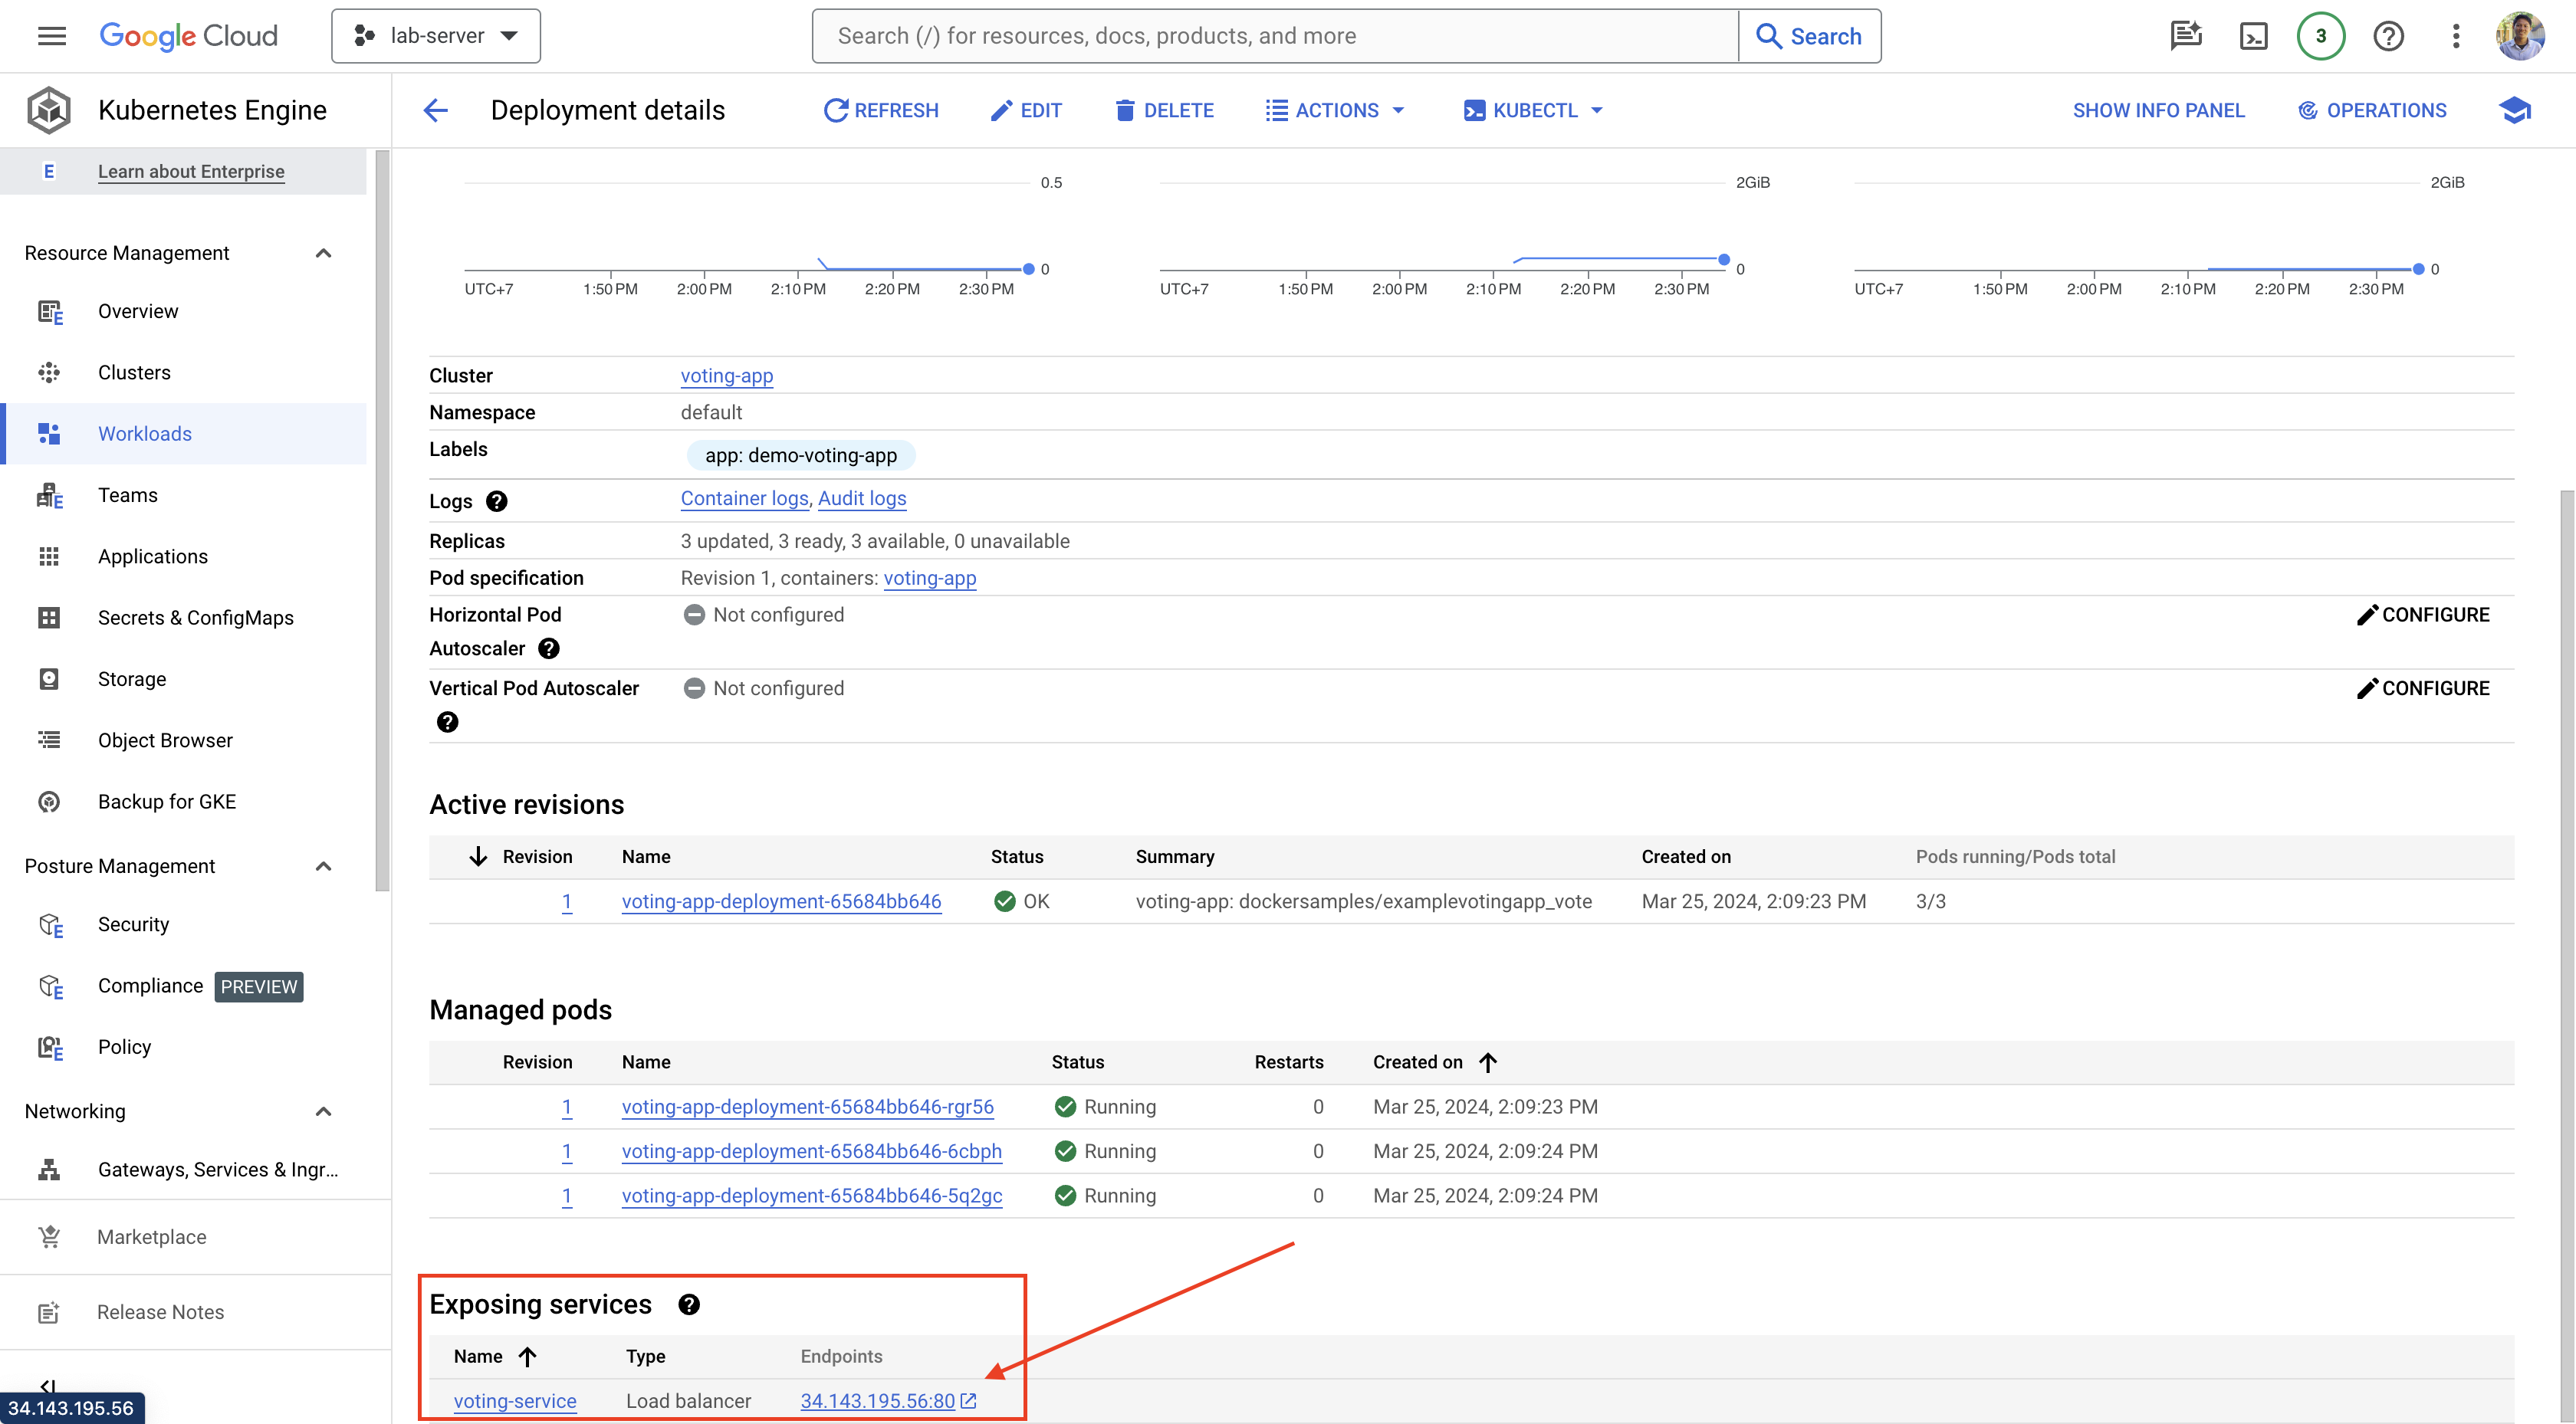
If you have got the Public IP Address, it will appear in the browser like this.
